
This document describes how to send a fax using the PayPerFax.com online fax service.
- 1. Enter the destination fax number and your email address
- 2. Optionally, compose a cover page
- 3. Optionally, attach one or more files
- 4. Click “Preview fax & check price”
- 5. Click “Continue to payment”
- 6. Track your fax on the tracking page
- 7. Receive a confirmation via email
- 8. Start a fax from an AI assistant
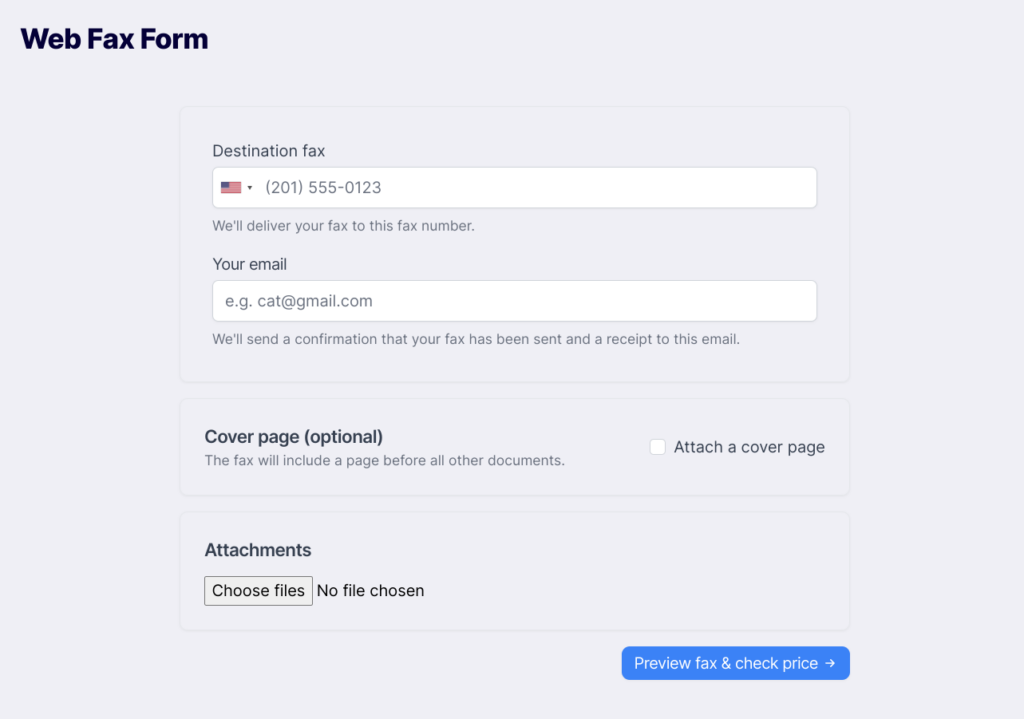
This is the basic web faxing form:
1. Enter the destination fax number and your email address
Select the country to which you wish to fax by clicking on the flag. Enter the destination fax number with an area code.
Enter your email address. This address will receive a notification about the fax’s final result (success/failure).
2. Optionally, compose a cover page
Do this by clicking the “Attach a cover page” checkbox. This will open up a set of fields that look like this:
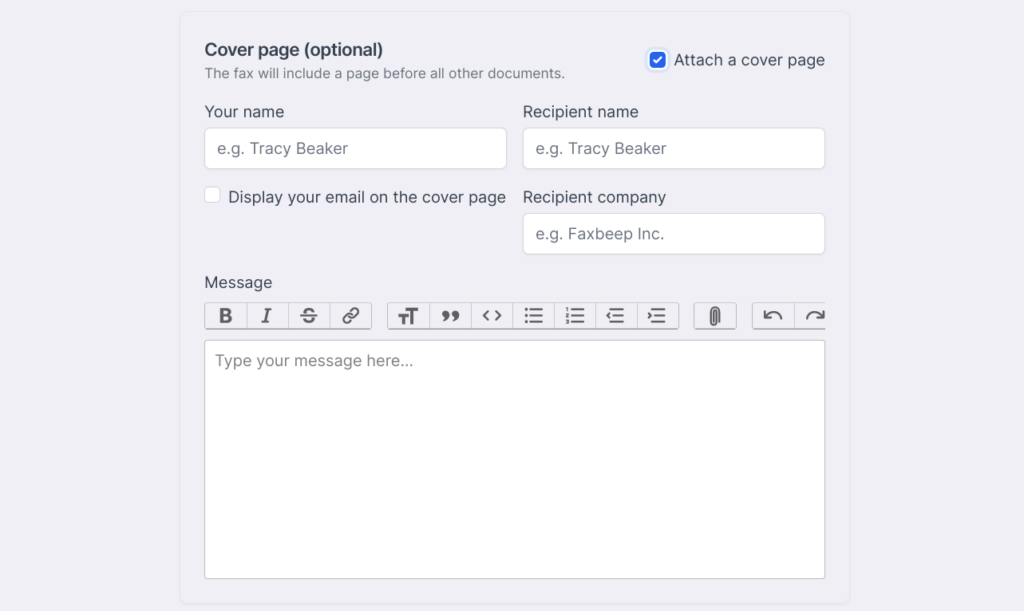
Clicking the “Attach a cover page” checkbox and filling in the fields will cause a first page to be sent ahead of any files you later attach.
3. Optionally, attach one or more files
Click “Choose files” and select a file from your computer. You can do this multiple times. Accepted file types are: pdf, doc(x), tif(f), jp(e)g, png, md (Markdown).
Note
Note that while both steps above say “Optionally”, either an attachment or a cover page must be chosen to be able to proceed and preview a fax.
4. Click “Preview fax & check price”
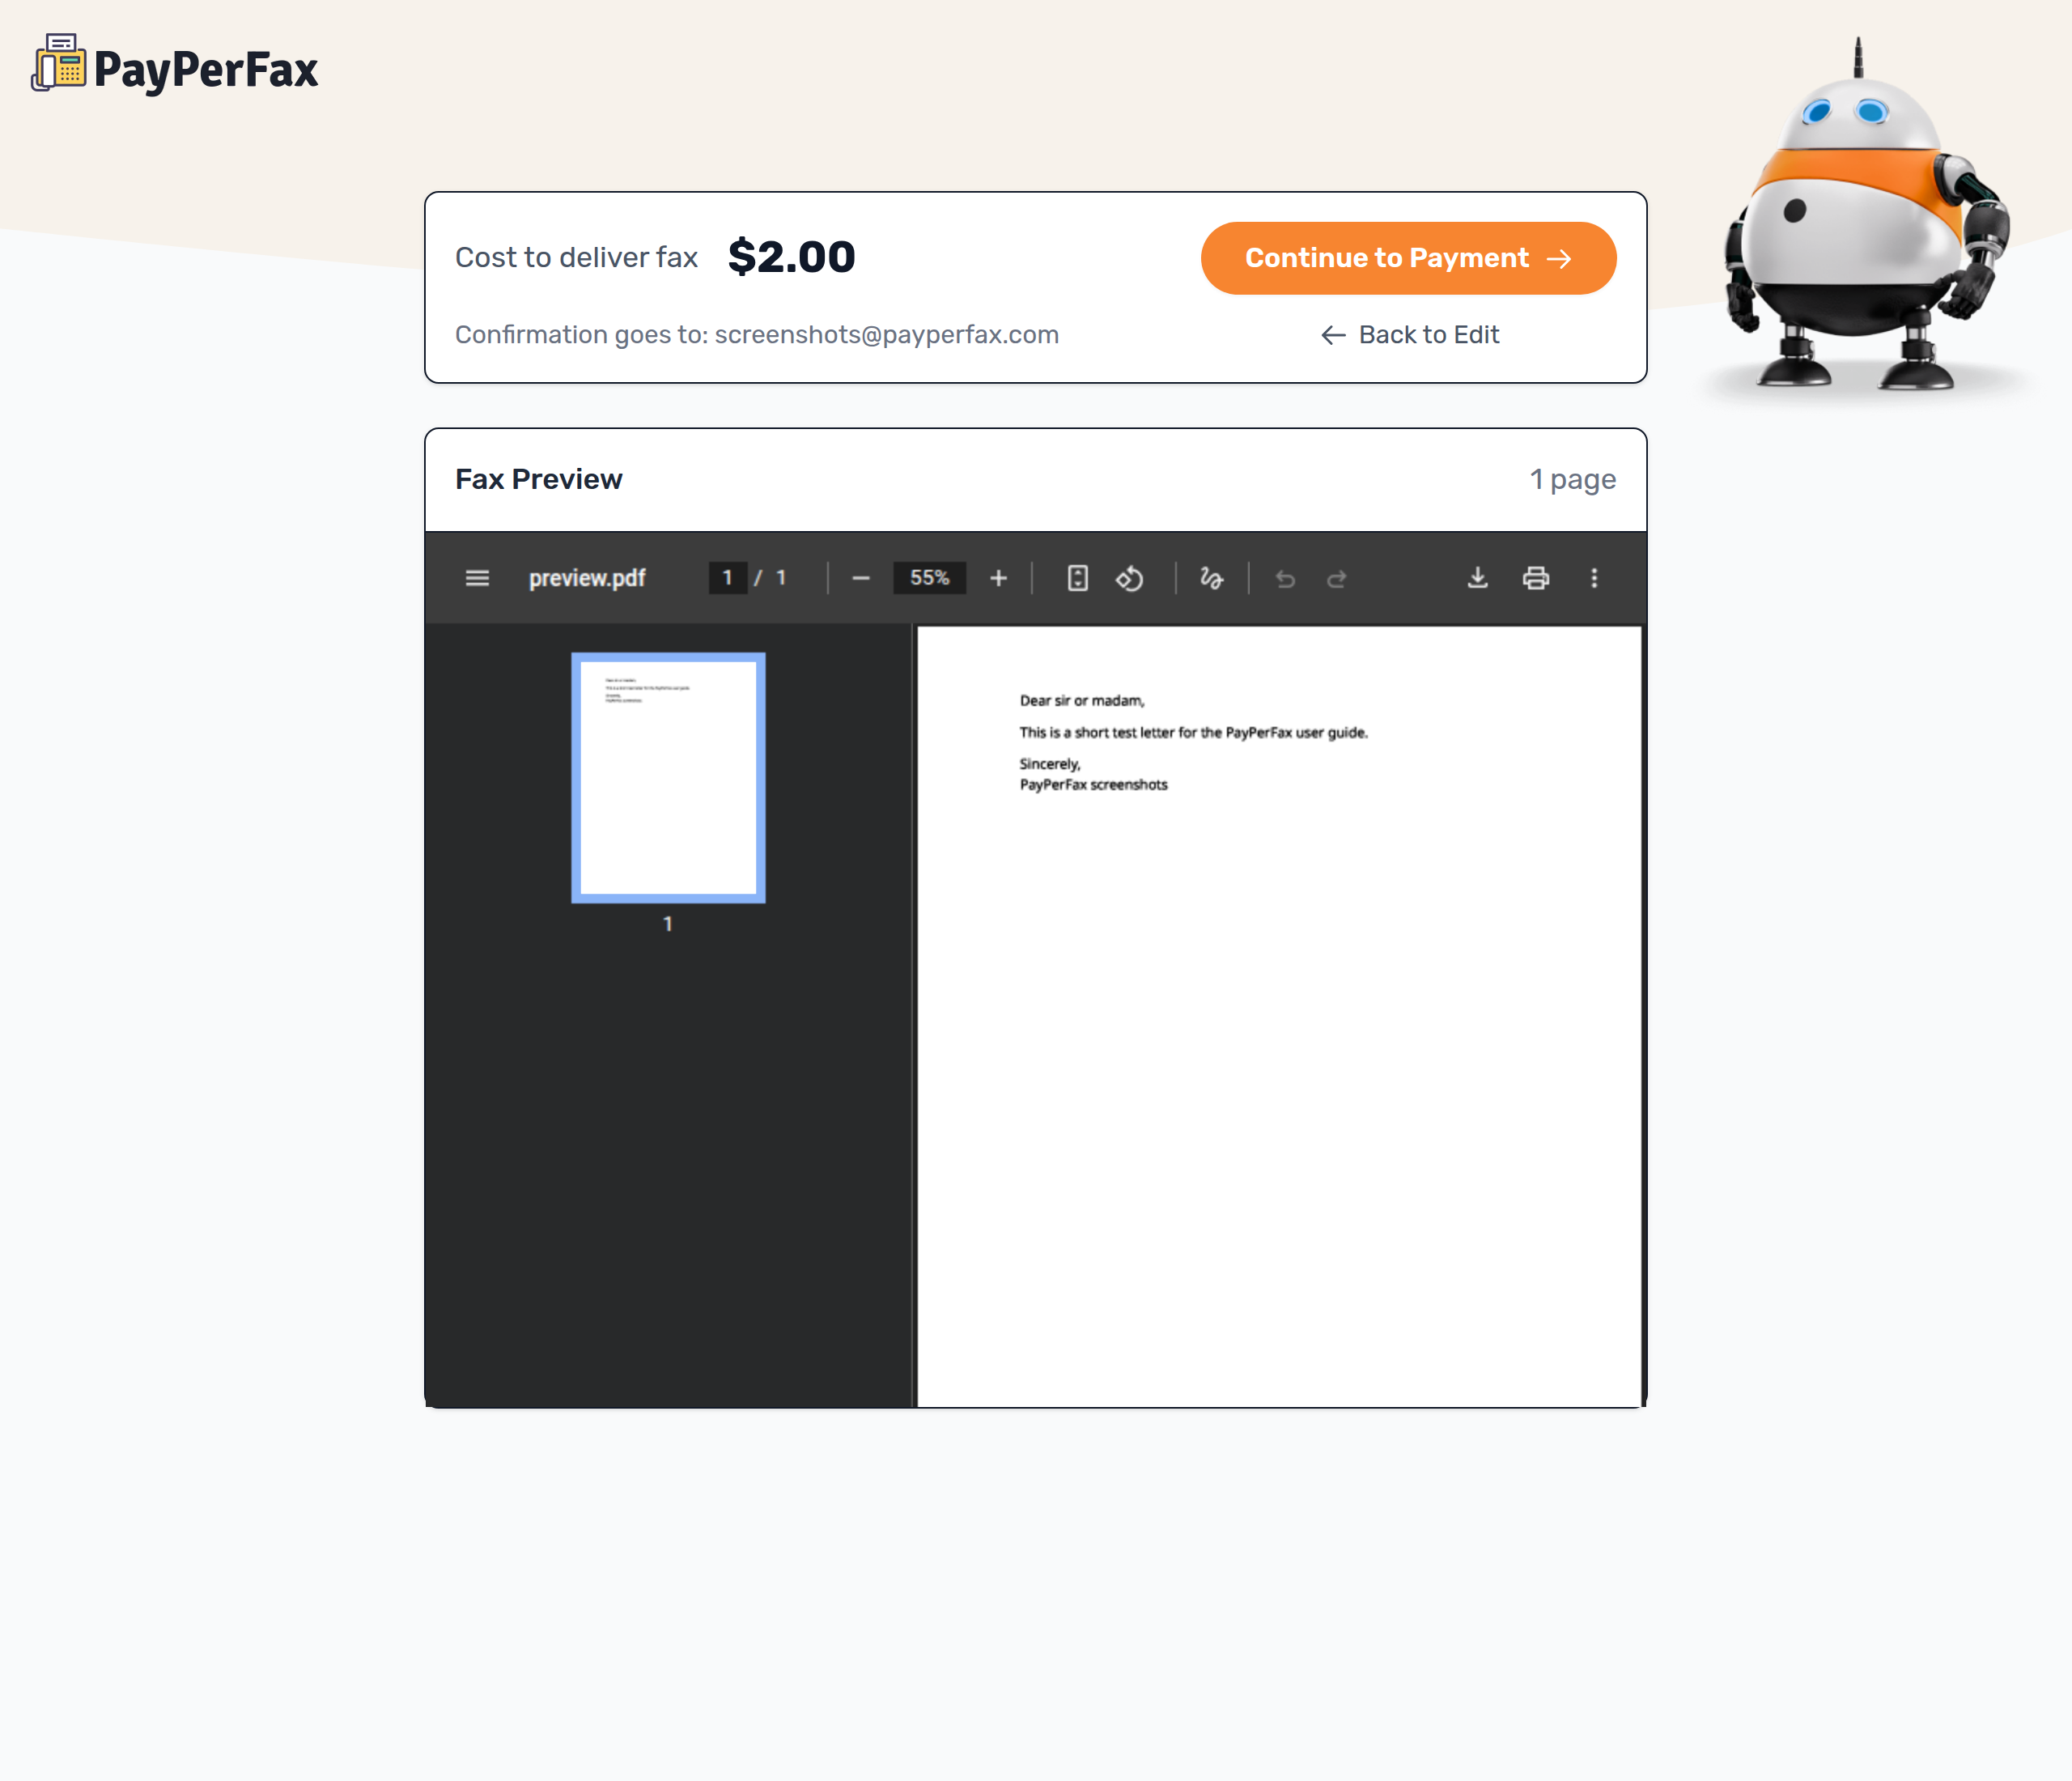
This will take you to the next page to show you what your fax will look like after our systems have processed your documents and/or cover page. You will also see a price, which is the guaranteed, final price of what it will cost to send your fax to its destination. This is what the preview will look like:
Note
It might take 30-60 seconds to create a fax preview and determine its price.
5. Click “Continue to payment”
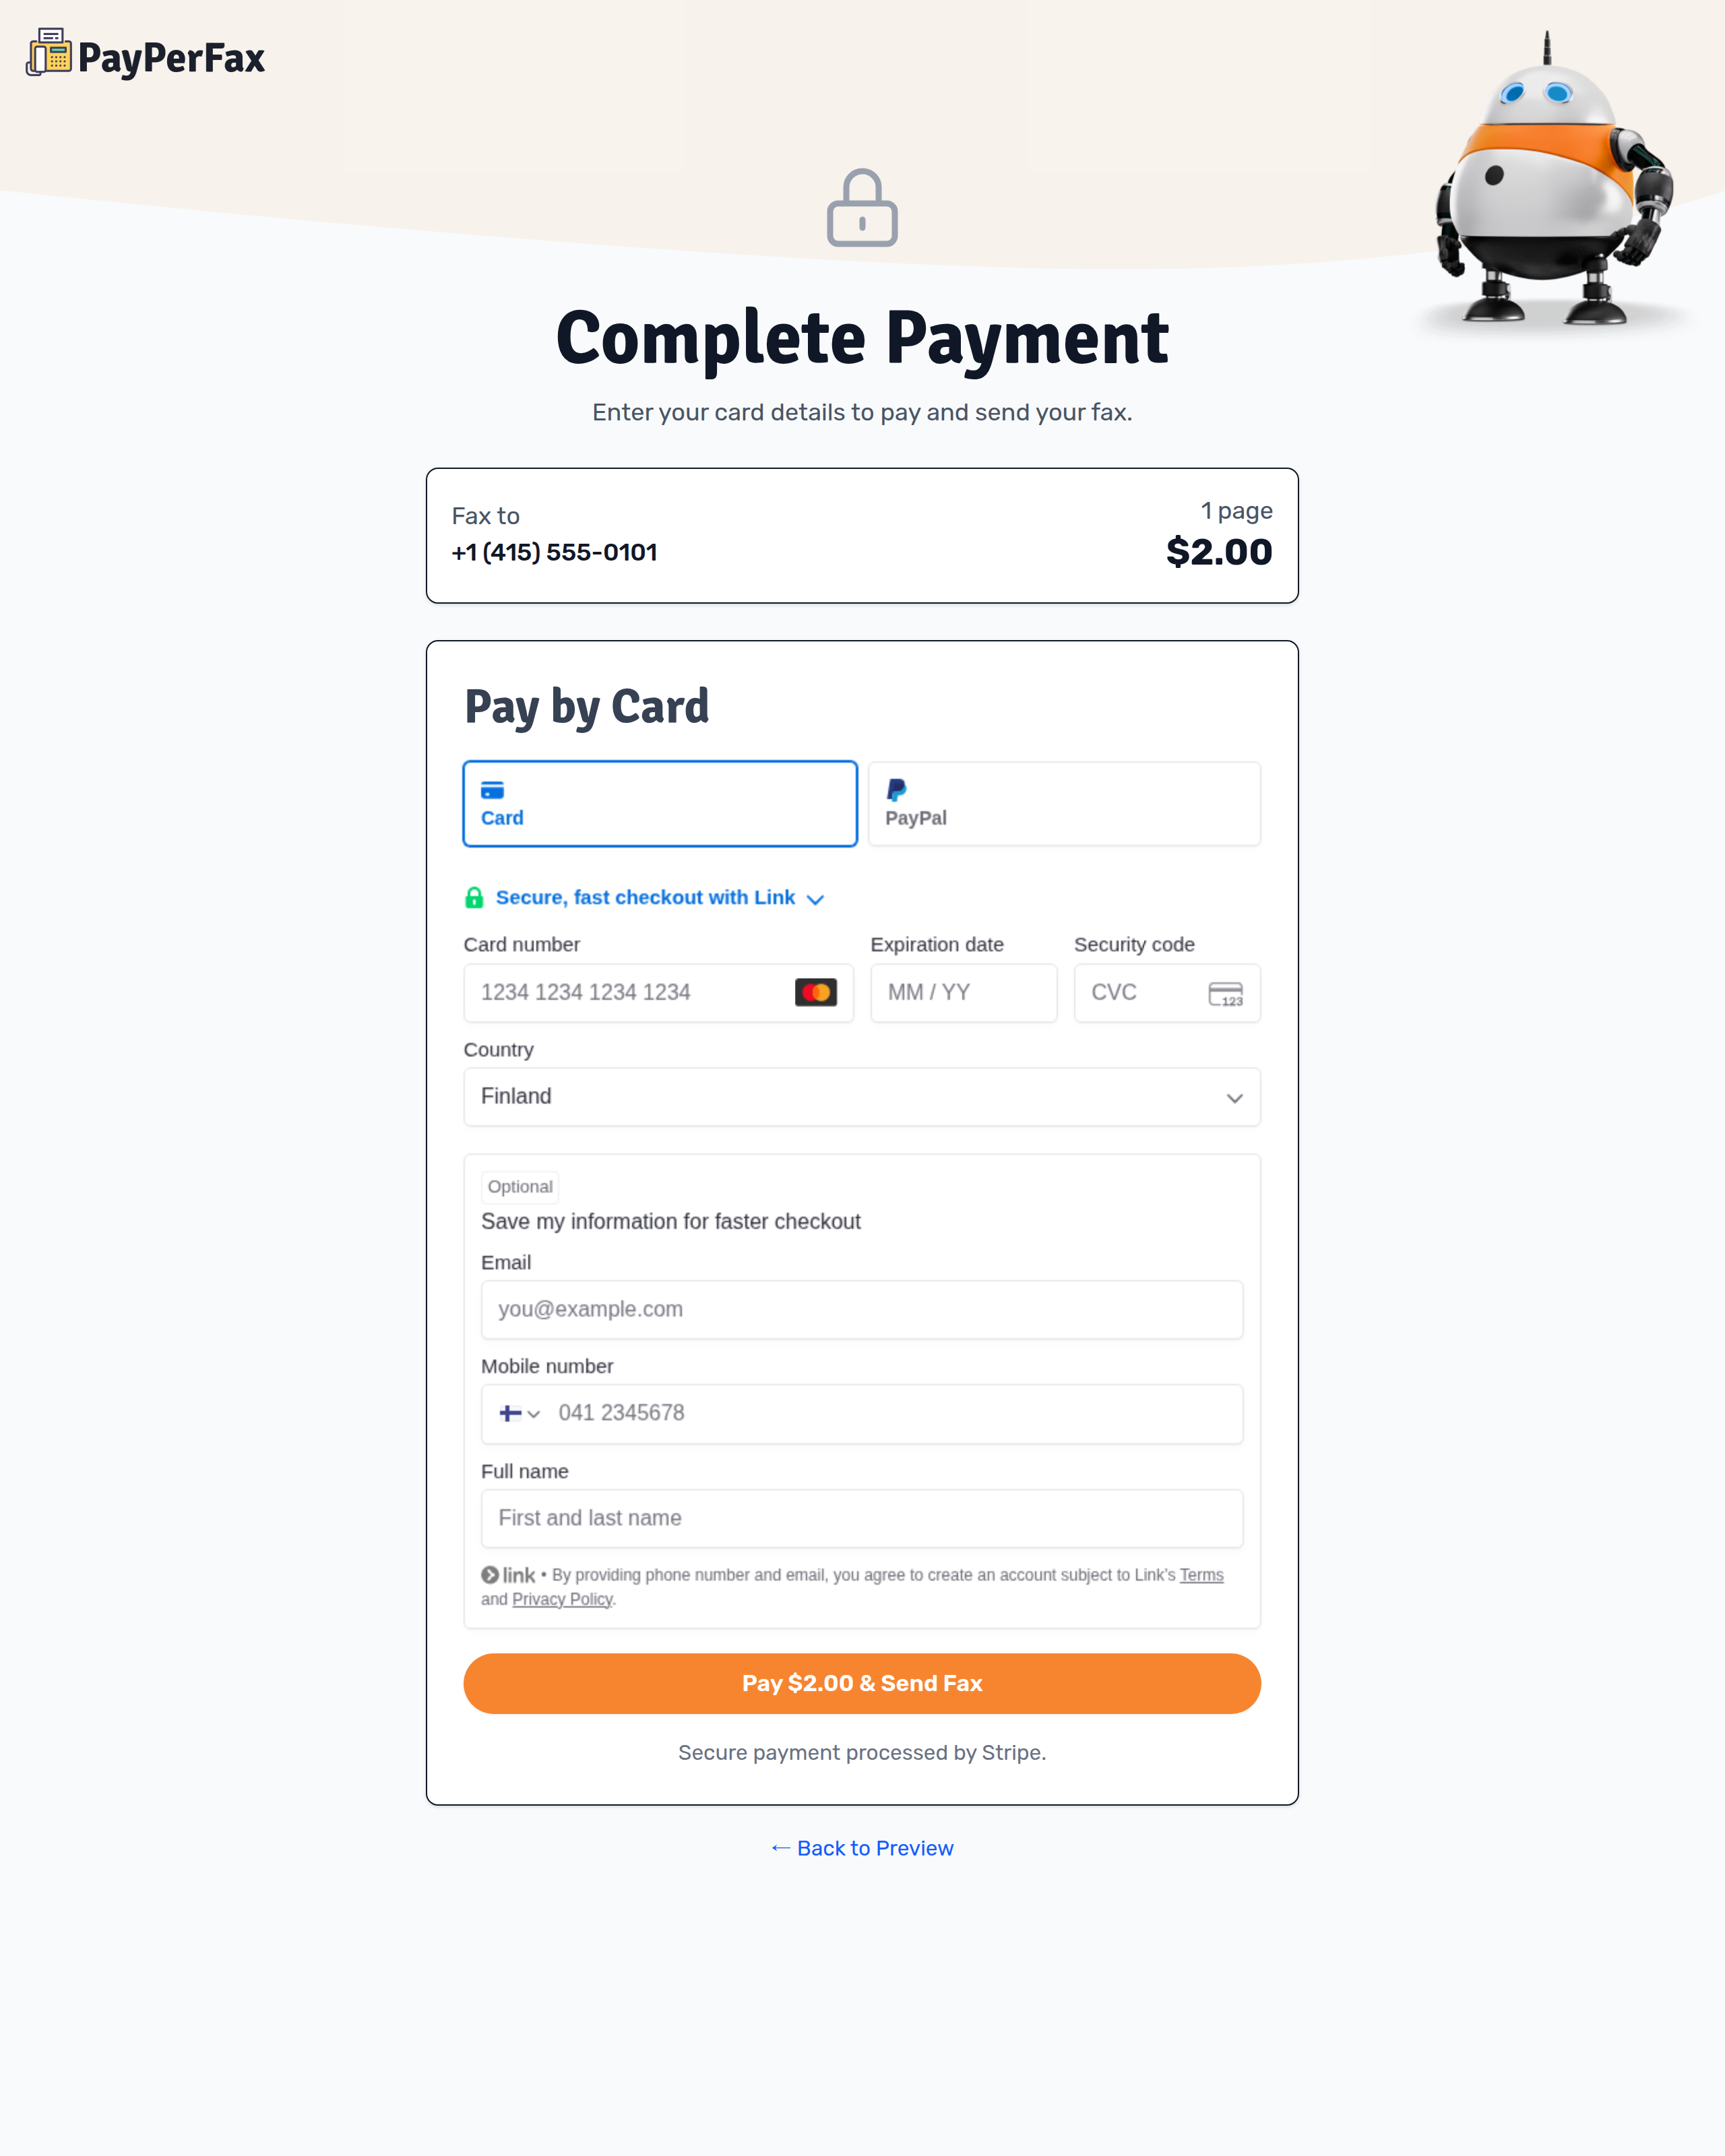
This will take you to the following page where you can either pay by entering your credit card details or by clicking through to your PayPal account and approving a payment there.
Note
Your card will not be immediately charged. Instead, a hold will be made in your account for the payment amount. Once your fax completes successfully, the charge will be applied. If the fax fails, the hold will be released from your account, and no charge will be taken.
6. Track your fax on the tracking page
The following screen will appear as long as the fax is in process of being sent:
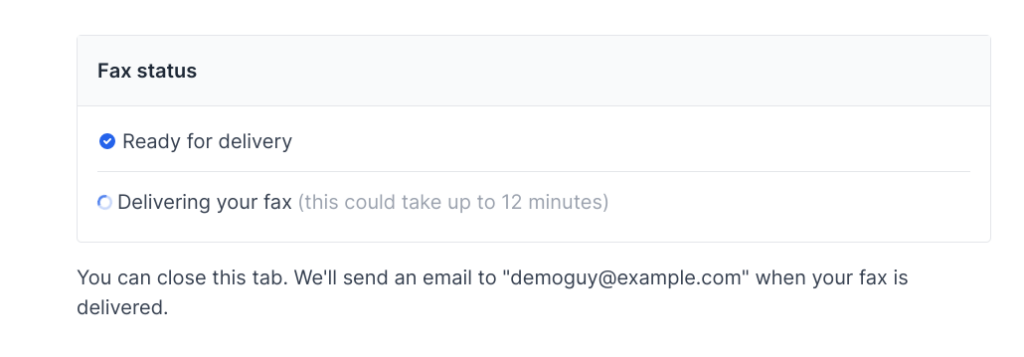
Once the fax is sent, the screen will change into this:
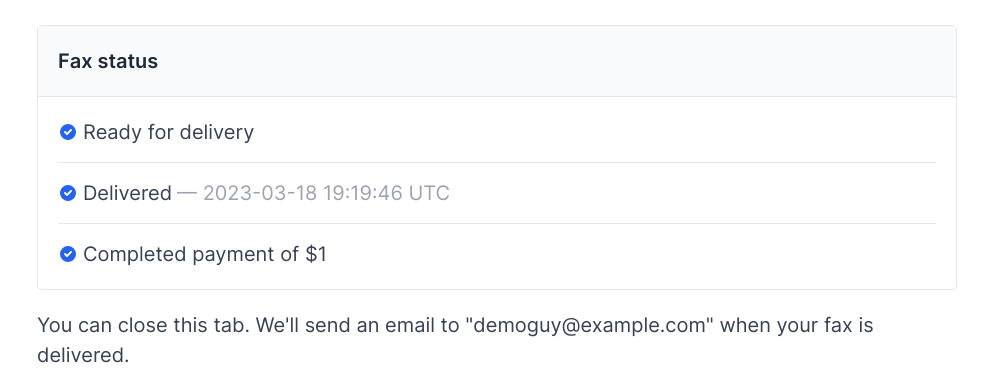
Note
You don’t actually need to wait around on this screen, as a confirmation email will be sent to you as soon as the fax is complete.
The tracking page also shows a short block titled Track this fax with your AI assistant. It contains a one-line prompt and a copy button. Paste the prompt into ChatGPT, Claude, Gemini or any other assistant that can open web addresses, and the assistant will read the same tracking page and tell you when the fax lands. The prompt only lets your assistant read the public status; it cannot cancel, resend or charge you.
7. Receive a confirmation via email
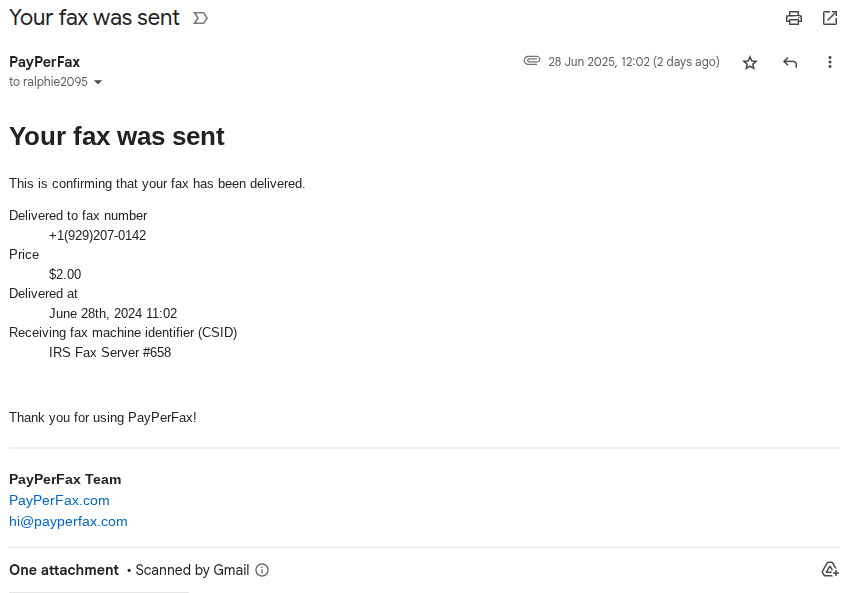
A confirmation will arrive in your email as soon as the fax is done. The email will include full details about the date and time of sending, and the identifier of the receiving end (CSID). The email will also include an attachment of the actual fax for your records.
8. Start a fax from an AI assistant
You can also start a fax from an AI assistant. There are two doors: the PayPerFax API for a coding agent (Claude Code, Codex, Cursor) or a chat app with a tool, and the PayPerFax MCP server for a chat app with native MCP support (Claude first). Both prepare the fax for you. There is no account to create and nothing for the assistant to register.
What happens depends on what the assistant has:
- If the assistant can send through the PayPerFax API, it posts the letter or the file directly and gives you back a link. The link opens the same preview you see when you start a fax on the web form, with the final guaranteed price. You pay in the browser and the fax goes.
- If the assistant speaks MCP, you add the PayPerFax MCP server once in your chat app’s connector settings and the assistant can prepare the fax from any thread. It hands you back the same preview link; you still check the fax and pay in the browser.
- If the assistant has no PayPerFax tool, it writes the letter for you as a file (PDF, DOCX or Markdown). You open the fax form and upload it the same way as in steps 1 to 3 above.
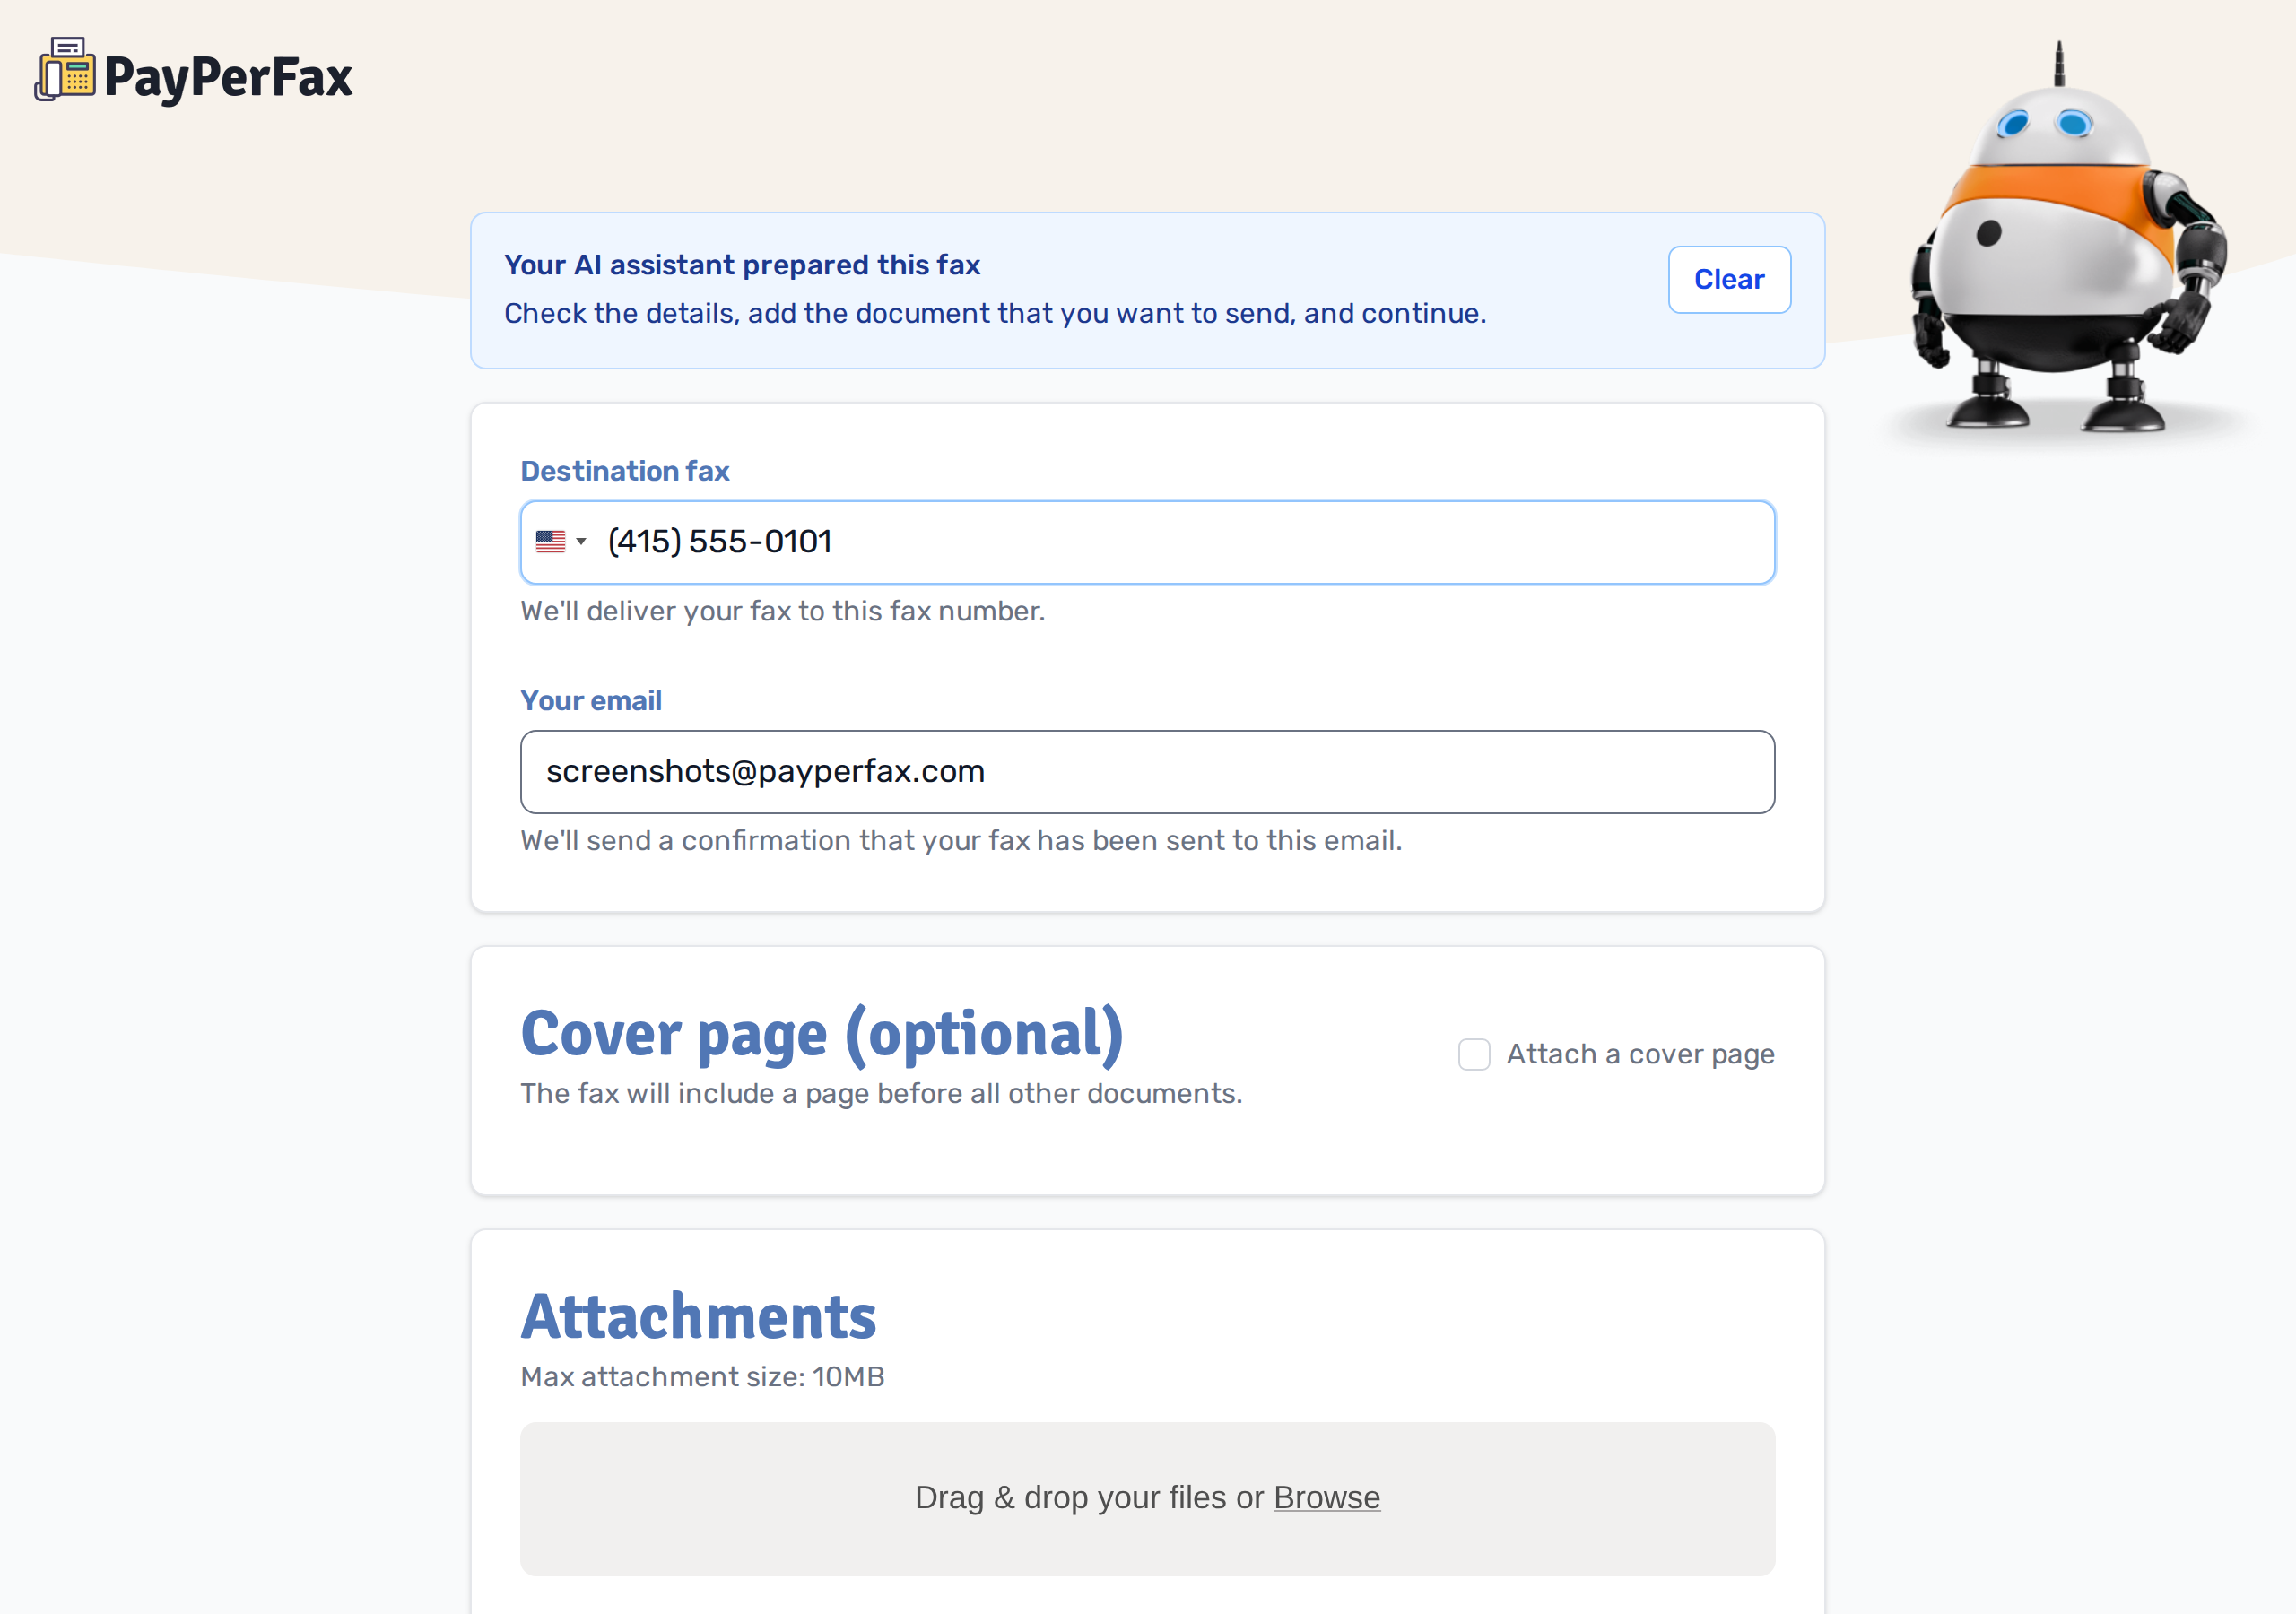
- If a signed form or scan is still missing, the assistant prepares the fax without the file and the link opens the fax form, pre-filled with everything the assistant knows, with a short notice that says “Your AI assistant prepared this fax”. You add the signed page yourself and continue from step 4 above.
This is what that pre-filled form looks like:
The assistant never pays and never sends on your behalf. Every fax goes through the same preview, payment and tracking that this guide describes.